Digitally Remastering Vinyl
A couple of weeks ago, I went to my local indoor market, and found a couple of old vinyl record shops, and as they had quite a few for only a pound, I decided to buy one for Jo - Bananarama, The Greatest Hits Collection, and one for me - Gram Parsons, Grievious Angel.
Anyway, I thought I’d have a good go at putting these albums onto mp3, and while going about it, I might as well see if I could get rid of the pops and clicks. We’ve got a couple of other records that I’ve thought about sorting out before as well (which had really bad pops and clicks), so it justified me buying a new stylus for the record player. Incidentally, most shops don’t sell styluses (is it styli?) anymore, but Maplin does. They seem to have quite a selection, although you might have to do a bit of homework to suss out exactly which stylus you need, as the original models might not exist.
So this post is really just to document how to do this, as I know that many people have vinyl stuffed somewhere in their loft (along with the record player), and some of those records probably don’t exist on cd, not to mention the cost of replacing all of them with cds.
The main ingredients are:
- a record player
- appropriate leads
- a microphone/line-in on your computer
- Audacity - this is free, and pretty good
- patience
Actually, there is one more ingredient, although it depends on your record player - most record players will need to have a phono preamp before plugging into your pc. This is to do with impedence and other technical issues I don’t understand… well, alright I do understand a little. My record player has a built-in line-output so I don’t have to worry about that…
If you need a preamp, you can opt for the one built into your (old) stereo. Most new stereos don’t have a phono input, so if you don’t have your old stereo anymore, you may need to purchase a phone preamp. Maplin sell those. Err, I don’t work for Maplin, I just use them for lots of electronic things. Then you need to plug the headphone or a line-out from the stereo into the mic or line-in of you pc. I would always prefer line-out to headphone, and line-in to mic, but unless you have a separate amp, you probably will only have headphone.
Obvously, you might run into issues with correct connectors. For example, here is the connector I used for connection the line-out of the record player to my computer mic socket:

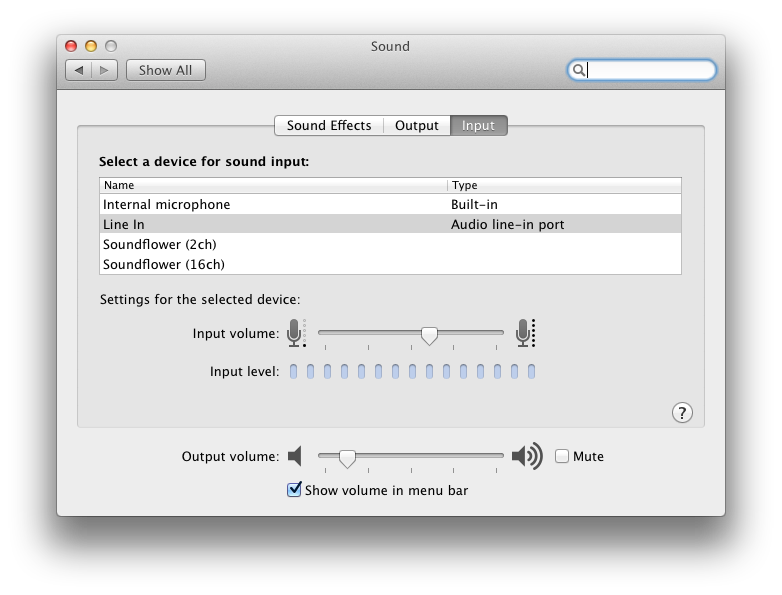
Before you can start recording you need to set your sound inputs so that you are recording the correct thing. On the Mac this is one in System Preferences -> Sound and then choosing the ‘Input’ settings:
With Windows this is done with the volume control in the taskbar, setting the recording devices (Windows 7).
Now you can load up Audacity. The first thing is to make sure you have selected the correct input. You might want to fiddle around with these until you get a sound recorded.

To be able to hear anything while recording, you will need to go into the Preferences menu, and choose the recording section. Make sure Overdub is checked, and Software Playthough - Hardware Playthrough may work - it depends on your pc - you’ll know if it works, becaus you’ll hear the record while you are recording.

While you’re there, check the quality setting (underneath recording on the preferences) - it should be set to Sample Rate of 44100hz, and 32-bit float samle format.
You won’t actually hear anything until you start recording, so hit the record button (the big red one), and check that sound comes through as you start the record. If you don’t hear anything, try different input settings on the main screen.
If you are successful, you will see audacity filling your screen with this:
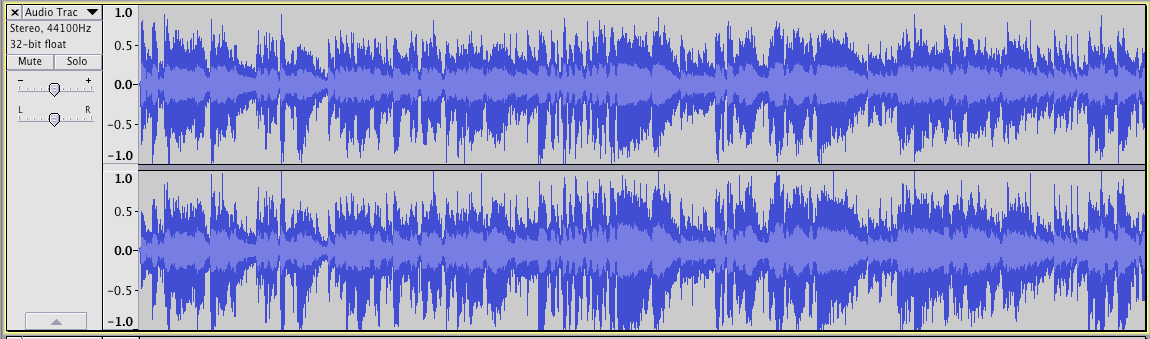
I recommend recording both sides in one go, because you can easily cut the bit between sides later.
Press stop (the square button), once you’re done.
Ok, so some important keyboard shortcuts:
- Command Key + e - zoom so your selection fills the screen
- Command Key + 3 - zoom out
- Command Key + 1 - zoom in
- 1 - play a second around the current cursor position
- F1 - change to the selection tool
- F3 - change to the drawing tool
- Space Bar - Play from current cursor, or stop.
These keys allow you to zoom in when you hear a pop or click.
Before you begin removing the pops and clicks, it’s worth cutting down the recording so that there isn’t a gap between sides, and that the recording starts at the beginning of the first track, rather than when you start the record. Simply zoom in so you can see everything clearly, and select the area to be removed, and press the delete key.
So now, start playing through your recording - you can disconnect the record player, because this in no longer needed. If you hear a pop or click, you can zoom in to where it is currently playing. Sometimes it is hard to find the pop or click when there is more noise going on, but usually you can seem them as thin lines going vertically. If you zoom in far enough (keep selecting smaller portions, and zooming your selection, or just zooming in), you’ll see dotted lines - these means you’ve zoomed in enough to be able to ‘draw’ out the pop:
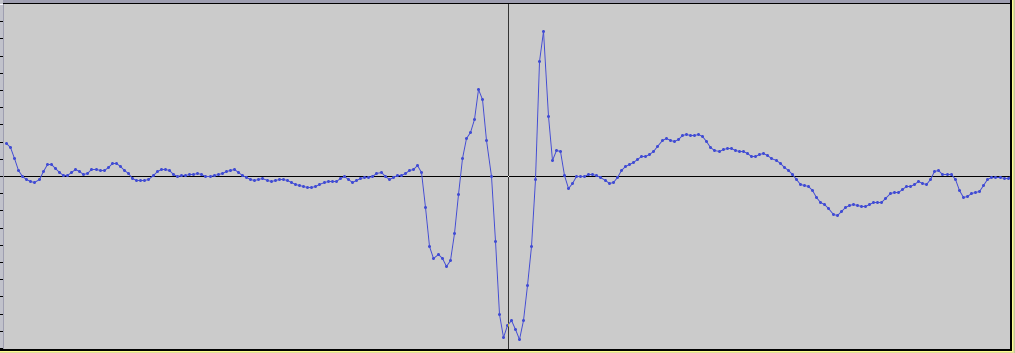
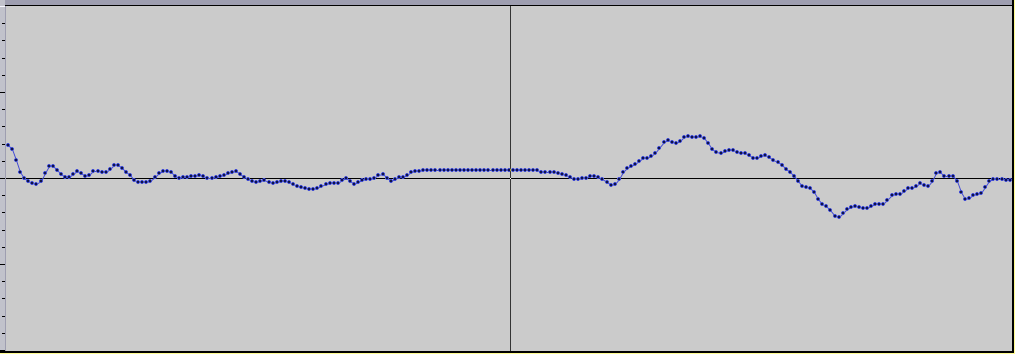
Once you’re zoomed in, press F3 to change to the drawing tool. The trick here is to draw a line that aproximates what would have been there if the pop wasn’t. Sometimes it helps to zoom out to see what the rest of the sound looks like, but most times, it’s pretty clear what to do.
Once you’re happy with the removal, you can split the whole recording into individual tracks. If you zoom out enough, you can see where each track ends, and the next one begings. You can insert a track marking where you put the cursor by selecting Tracks -> Add Label at Selection. You then give a name for each track in the text box that appears.
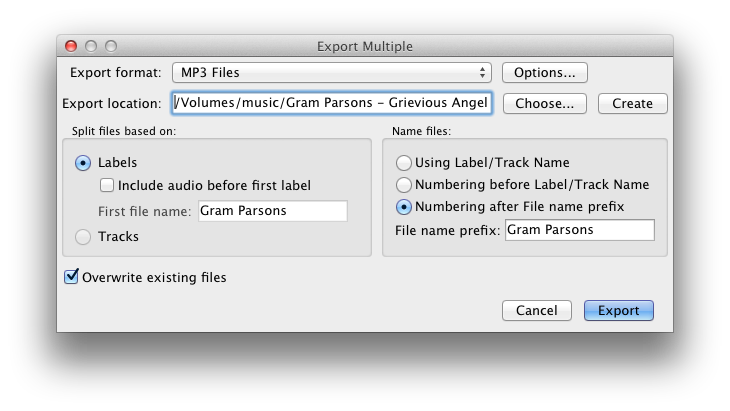
You can then export the whole album to a set of mp3s, or as wav files. Choose File -> Export Multiple:
Choosing Wav is useful if you want to burn a cd. I normally go for mp3 files, because CDs are pretty much obsolete right? :-)
I’ve found it best to specify in the ‘Name files:’ section to use ‘Numbering after File name prefix’, as if you have strange characters in the track names like an apostrophe, you won’t be able to export that track if you use ‘Using Lable/Track Name’ or ‘Numbering before Lable/Track Name’.
An important point to remember is that if you want to do more work on the project, you need to save the project - exporting the tracks won’t remember the workspace, it just creates the music files for playing in your media player / cd.
Let me know in the comments how you go!
2 Comments
gay tube
youtube to mp4